After wading through much internet lore; navigating hours upon hours of trial and error-debunking many internet promises, mind you….. here is THE BEST WAY, I have found yet to print on fabric; from HOME, using your very own INKJET printer. (I haven’t tried this yet with a laser printer, but I am guessing it will work just fine, too). This little beauty is quick, easy, and stinkin’ adorable!

What you will need:
-An embroidery hoop……… (I found mine at Goodwill for like 10 cents).
-Fabric……….. (I used an old curtain I had hanging around- no pun intended).
-Heat n’ Bond……….. (You can find this at any craft or sewing store)
-An iron
-A digital file that can be printed (your design)….. (I got mine HERE)
-Scissors
-And a ruler
Let’s get started!
I used contact paper in this picture so that you could see it better since both the Heat n’ Bond and my material are white.
- Cut your Heat n’ Bond to the size of “paper” you want to run through your printer.
- Iron it down to the fabric (according to the manufacturer’s instructions).
- Cut your fabric out around the edge of the Heat n’ Bond.

4. Choose the image that you want to transfer to your material. You need to be careful about copyrights, especially if you are going to use this for a gift, or to sell.
5. As you can see below, I had to change the scale of my image to 50% so that it would print out the correct size and in the middle of the page.
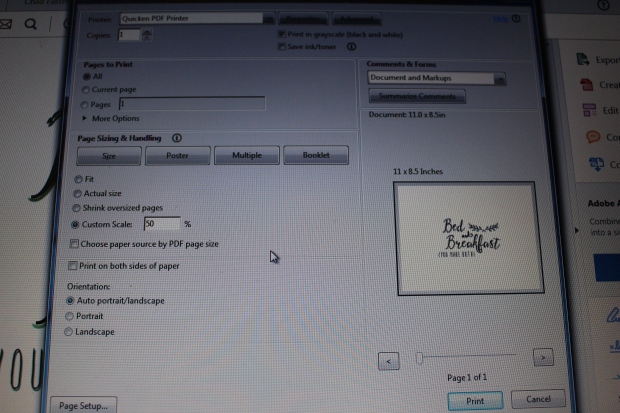
Hint: print your image out on regular paper first, to make sure that it is just the way you want it before you run your fabric through.
6. Now you are ready to print. Make sure that you place your fabric in your printer the correct way- so that you are printing on the fabric not on the Heat n’ Bond.

For my printer, I had to lay mine FABRIC DOWN.
7. PRINT and voila!

8. Next, I laid my embroidery hoop over the design and trimmed about a 1/2 to 3/4 of an inch around the hoop.
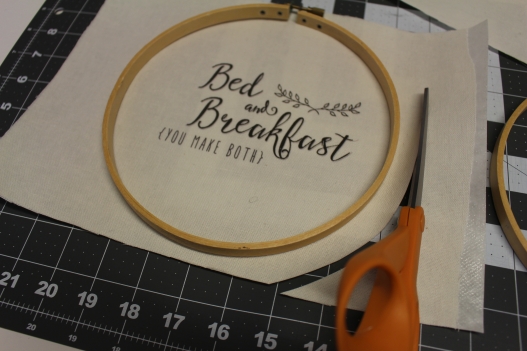
9. Attach the hoop. You may want to trim a little bit more once it was all together. You will want to trim as close to the rim as you can so that it will lay flat on your wall.

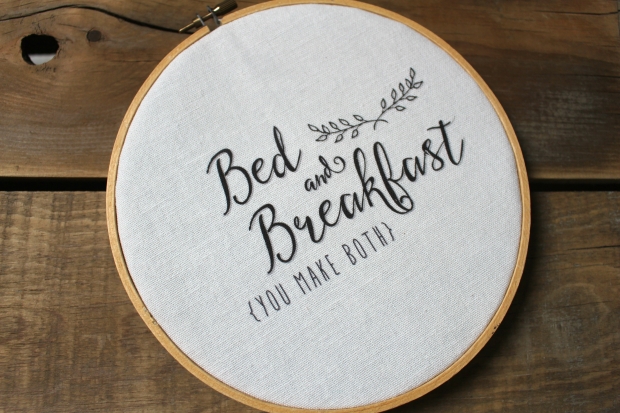
10. Give it to a friend, or find a cute place in your home to hang it up, because really, it is so DARN awesome you really won’t want to part with it.

So cute! Great tutorial!
LikeLike
Thanks! I am glad you like it!
LikeLike
This item is for sale at: https://www.etsy.com/listing/270531107/bed-and-breakfast-you-make-both?ref=shop_home_active_1
LikeLike